Metal wall art can add a touch of elegance and sophistication to any space. Whether you're a seasoned decorator or just starting to explore the world of interior design, hanging metal wall art can be daunting. But fear not; with the right knowledge and a little bit of guidance, you can hang your metal wall art like a pro! This article will take you through the hanging metal wall art process in five simple steps.
Understanding the Basics of Metal Wall Art
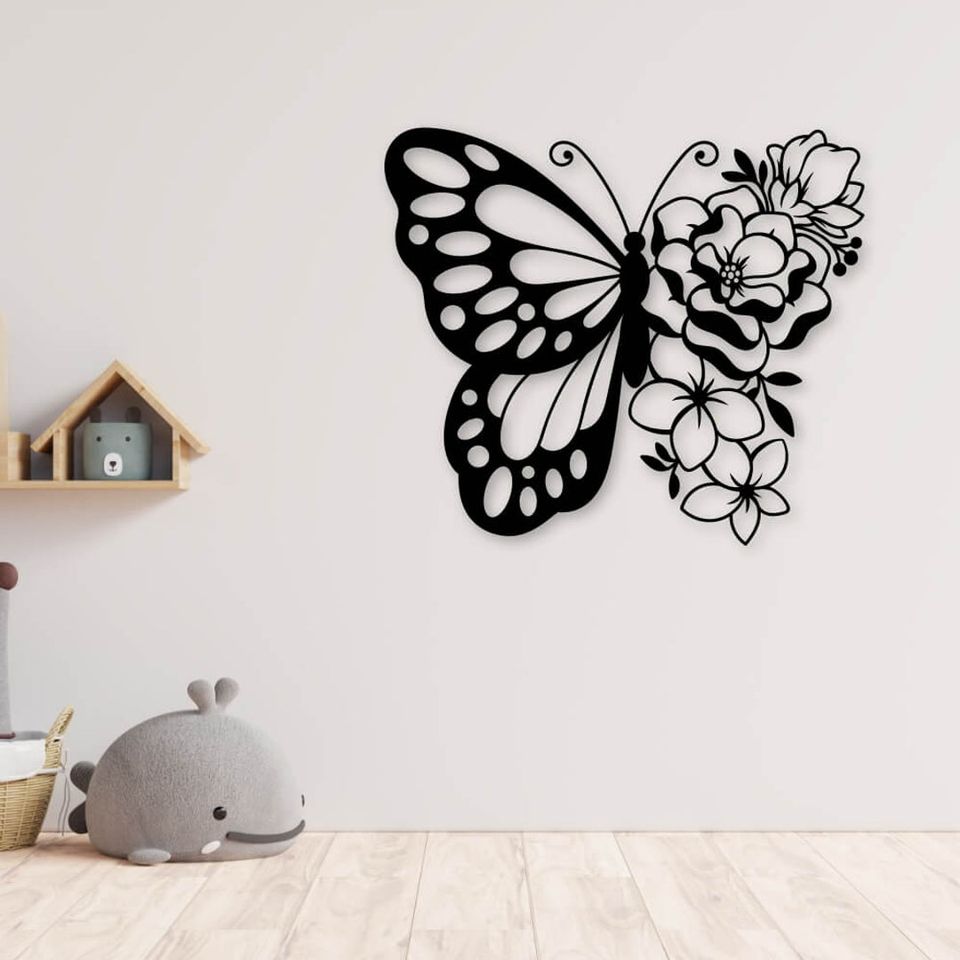
Before diving into the practical steps of hanging metal wall art, here is what you need to know about metal wall art. Metal wall art is an artwork created using various metals, such as iron, aluminum, or stainless steel. This type of art can come in many different forms, including sculptures, wall hangings, and even framed pieces. Metal wall art is known for its durability, versatility, and unique ability to create a striking visual impact in any room.
When it comes to metal wall art, the possibilities are truly endless. Artists can manipulate the metal to create intricate designs, textures, and shapes that will captivate anyone who sees them. From abstract pieces that evoke emotion and spark conversation to nature-inspired creations that bring the outdoors inside, metal wall art offers a wide range of options to suit various tastes and preferences.
One of the key advantages of metal wall art is its durability. Unlike other types of wall decor, such as paintings or prints, metal wall art is built to last. The metals used in its creation are resistant to fading, warping, and damage from moisture or sunlight. This makes metal wall art a great investment for those looking to adorn their walls with long-lasting, high-quality pieces.
Another reason why metal wall art is a popular choice among homeowners and interior designers is its versatility. Metal wall art can be easily customized to fit any space and style. Whether you want to add a bold statement piece to a minimalist living room or create a focal point in a traditional dining room, metal wall art can be tailored to your specific needs.
Additionally, metal wall art can be combined with other materials, such as wood or glass, to create a truly unique and visually stunning display. One of the most fascinating aspects of metal wall art is its ability to create a striking visual impact. The reflective nature of metal can add depth and dimension to a space, making it appear larger and more dynamic. Metal wall art can also play with light, casting intriguing shadows and creating interesting patterns on the surrounding walls. Whether you choose a large, statement piece or a collection of smaller artworks, metal wall art has the power to transform any room into a captivating and visually enchanting space.
The next time you consider decorating your walls, don't forget to explore the world of metal wall art. With its durability, versatility, and ability to create a striking visual impact, metal wall art is a fantastic choice for adding a touch of elegance and personality to your home.
Preparing Your Space for Metal Wall Art
Now that you understand metal wall art better, it's time to prepare your space for installation. The first step in preparing your space is to choose the wall where you want to hang your metal art. Consider factors such as the size and color scheme of the wall, as well as the room's overall design. Once you've chosen the wall, measuring the area is important to ensure that your metal wall art will fit perfectly.
When it comes to measuring your space, precision is key. Use a measuring tape to determine the exact dimensions of the area where you plan to hang your metal art. This will ensure that your artwork is centered and properly displayed. It's also a good idea to take note of any electrical outlets or switches on the wall, as these may affect the positioning of your art.
Next, you can explore the different styles and designs of available metal wall art. Metal wall art can range from abstract and contemporary to nature-inspired and traditional. You can find pieces that feature intricate designs, geometric patterns, or even three-dimensional elements. The choice is yours, and it's important to select a piece that resonates with your personal style and complements the overall aesthetic of your space.
Once you have chosen the perfect metal wall art for your space, it's time to consider the placement. Think about the visual impact you want to create. Do you want your metal art to be the room's focal point, or do you prefer a more subtle and understated look? Consider the height at which you want to hang your art. Eye level is typically a good starting point, but you can also experiment with different heights to create visual interest.
Before you begin the installation process, preparing the wall surface is important. Make sure the wall is clean and free from any dust or debris. You can use a mild detergent and water solution to gently clean the wall and then allow it to dry completely. If you have a textured wall, you may need to use a sanding block to smooth out any rough areas. This will ensure that your metal wall art adheres properly to the surface.
Now that you have prepared your space and chosen the perfect metal wall art, it's time to hang your artwork. Start by marking the desired placement on the wall using a pencil or painter's tape. This will serve as a guide when you are ready to hang your art. If your metal wall art has built-in hanging brackets, follow the manufacturer's instructions to securely attach them to the back of the piece. If not, you can use wall anchors and screws to hang your art. Make sure to use a level to ensure that your artwork is straight and aligned.
Once your metal wall art is securely in place, step back and admire the transformation of your space. Metal wall art can elevate any room's look, adding a touch of sophistication and personality. Take a moment to appreciate the intricate details of your artwork and the way it interacts with the surrounding elements in your space.
Remember, the beauty of metal wall art lies in its visual appeal and the emotions it evokes. Each piece tells a unique story and has the ability to create a captivating atmosphere. So, enjoy the process of preparing your space for metal wall art and let your creativity shine through!

Step-by-Step Guide to Hanging Metal Wall Art
With your space prepared, it's time to get down to business and start hanging your metal wall art. Follow these five simple steps for a professional-looking installation:
Step 1: Gather Your Tools
Before you begin, gather all the necessary tools for the job. You'll need a drill, screws or wall anchors, a level, a tape measure, and a pencil. These tools will make the hanging process much easier and more efficient.
When choosing a drill, make sure it has enough power to penetrate the wall material you are working with. A cordless drill with a screwdriver bit will suffice for drywall or plaster walls. However, if you are hanging your metal wall art on a concrete or brick wall, you may need a more powerful drill with a masonry bit.
Consider using a stud finder to locate the studs behind the wall. Attaching your metal wall art to a stud will provide extra stability and ensure a secure installation.
Step 2: Mark Your Spot
Once you have your tools ready, use a pencil to mark the desired position of your metal wall art on the wall. Take into account the measurements you previously took and ensure that your mark is centered and at the desired height.
Before making your mark, consider the overall aesthetic of the room. Take into consideration the surrounding furniture, lighting, and other decorative elements. You want your metal wall art to complement the space and create a cohesive look.
Step 3: Install the Wall Anchors
If you're hanging your metal wall art on a drywall or plaster wall, it's important to use wall anchors to provide additional support. Follow the instructions on the wall anchor packaging and carefully install them at the marked spots on your wall.
Wall anchors come in various types, such as plastic expansion anchors, toggle bolts, or screw-in anchors. Choose the appropriate type based on the weight of your metal wall art and the type of wall material you are working with.
When installing the wall anchors, make sure to drill the holes slightly smaller than the anchor size to ensure a snug fit. This will prevent the anchors from slipping or falling out of the wall.
Step 4: Hang the Art
With the wall anchors in place, it's time to hang your metal wall art. Carefully align the hanging hardware on the back of your art with the wall anchors and gently lower it onto the wall. Make sure to apply even pressure to ensure a secure fit.
If your metal wall art has multiple hanging points, use a level to ensure that it is perfectly straight. Adjust the positioning as needed to achieve the desired look. Consider using a second person to assist you during this step, especially if your metal wall art is large or heavy. Their help can make the process smoother and reduce the risk of accidentally dropping or damaging the artwork.
Step 5: Make Adjustments
Once your metal wall art is hung, step back and take a look at the overall composition. Use a level to ensure that your art is perfectly straight. Make any necessary adjustments to achieve the desired placement and alignment.
Consider the lighting in the room and how it interacts with your metal wall art. You may need to adjust the positioning to minimize glare or maximize the artwork's visibility. Don't be afraid to experiment with different arrangements or groupings of metal wall art. You can create a visually striking display by combining multiple pieces or incorporating other decorative elements such as mirrors or framed photographs.
Remember to periodically check the stability of your metal wall art over time. If you notice any loosening or shifting, tighten the screws or wall anchors as needed to ensure a secure installation.
Now that you have successfully hung your metal wall art take a moment to appreciate the transformation it brings to your space. Metal wall art can add a touch of sophistication, texture, and personality to any room, making it a worthwhile investment for your home.
Tips to Hang Metal Wall Art Like a Pro
Now that you know the step-by-step process of hanging metal wall art, here are a few additional tips to help you achieve a professional-looking installation:
Using a Level for Precision
When it comes to hanging metal wall art, accuracy is crucial. Using a level can help ensure that your art is perfectly straight and aligned. Take your time and double-check the level before making any final adjustments.
Considering Lighting and Visibility
Before hanging your metal wall art, consider the lighting and visibility in the room. Take into account any natural or artificial lighting sources to ensure that your art is appropriately showcased and not overshadowed by shadows or glare.
With these tips and step-by-step instructions, you're well-equipped to hang your metal wall art, such as a wall art monogram by American Steel Designs, like a pro. Remember to take your time, measure twice, and always consider the room's overall aesthetics. Enjoy the process and admire your beautifully displayed metal wall art!